Britax Advocate Convertible Carseat Review
We have reviewed many Britax seats over the years and honestly, they’ve never failed to knock our socks off. Britax has been on the front line of car seat technology for many years and they have devoted themselves to constantly making their new seats better and safer than the previous ones. The ClickTight system is the latest and greatest example of this and thousands of families use these seats every day.
 In a lot of ways, this particular review will just be a bit of an update to the already very thorough review of the Britax Boulevard Clicktight, but for a few small differences.
First, and most obviously, it’s an Advocate ClickTight not a Boulevard CT, but the only significant difference between the two models is the external side-impact cushions on the Advocate. Now, that’s not to say they are not significant, as they provide an extra layer of energy-absorbtion and side-impact protection, it’s just to say that the interior of the seat is essentially identical to the Boulevard CT, so there’s not much to add there. Second, this particular version of the Advocate comes with an anti-rebound bar (ARB). You can also purchase a Boulevard ClickTight with ARB if you prefer the Boulevard model. If you already own an Advocate or Boulevard model with ClickTight, you can order the ARB separately for your seat.
What IS an Anti-Rebound Bar?
 Some of you may be wondering what an anti-rebound bar is, so before we jump into the review, it’s worth reviewing the function of an ARB. The anti-rebound bar is a U shaped piece of metal that connects to the foot area of the car seat and rests against the vehicle seat back in rear-facing mode only. The anti-rebound bar prevents the seat from rebounding or bouncing back into the vehicle seat back during the final stages of a frontal crash. In Britax’s private crash tests, they found that their ARB reduces the rebound of their seats by 40% and provides improved stability for front, rear-end and side-impact crashes. It may seem like an unassuming car seat accessory, but this chunk of metal does more than meets the eye.
What Comes With the Advocate CT and What Comes Separately?
The Advocate with ARB comes out of the box with the anti-rebound bar, energy absorbing HUGS, the EZ-Buckle System, infant body cusion and strap covers.
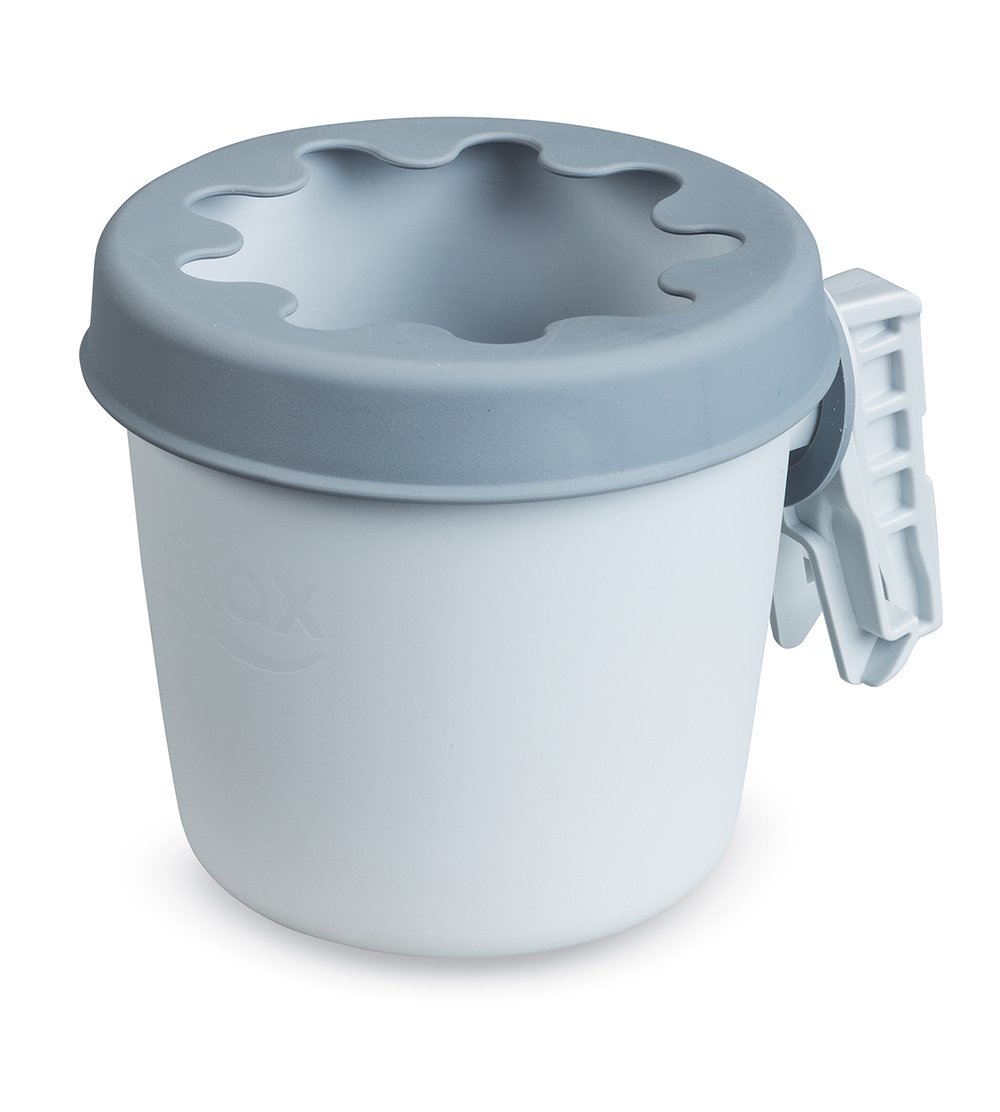
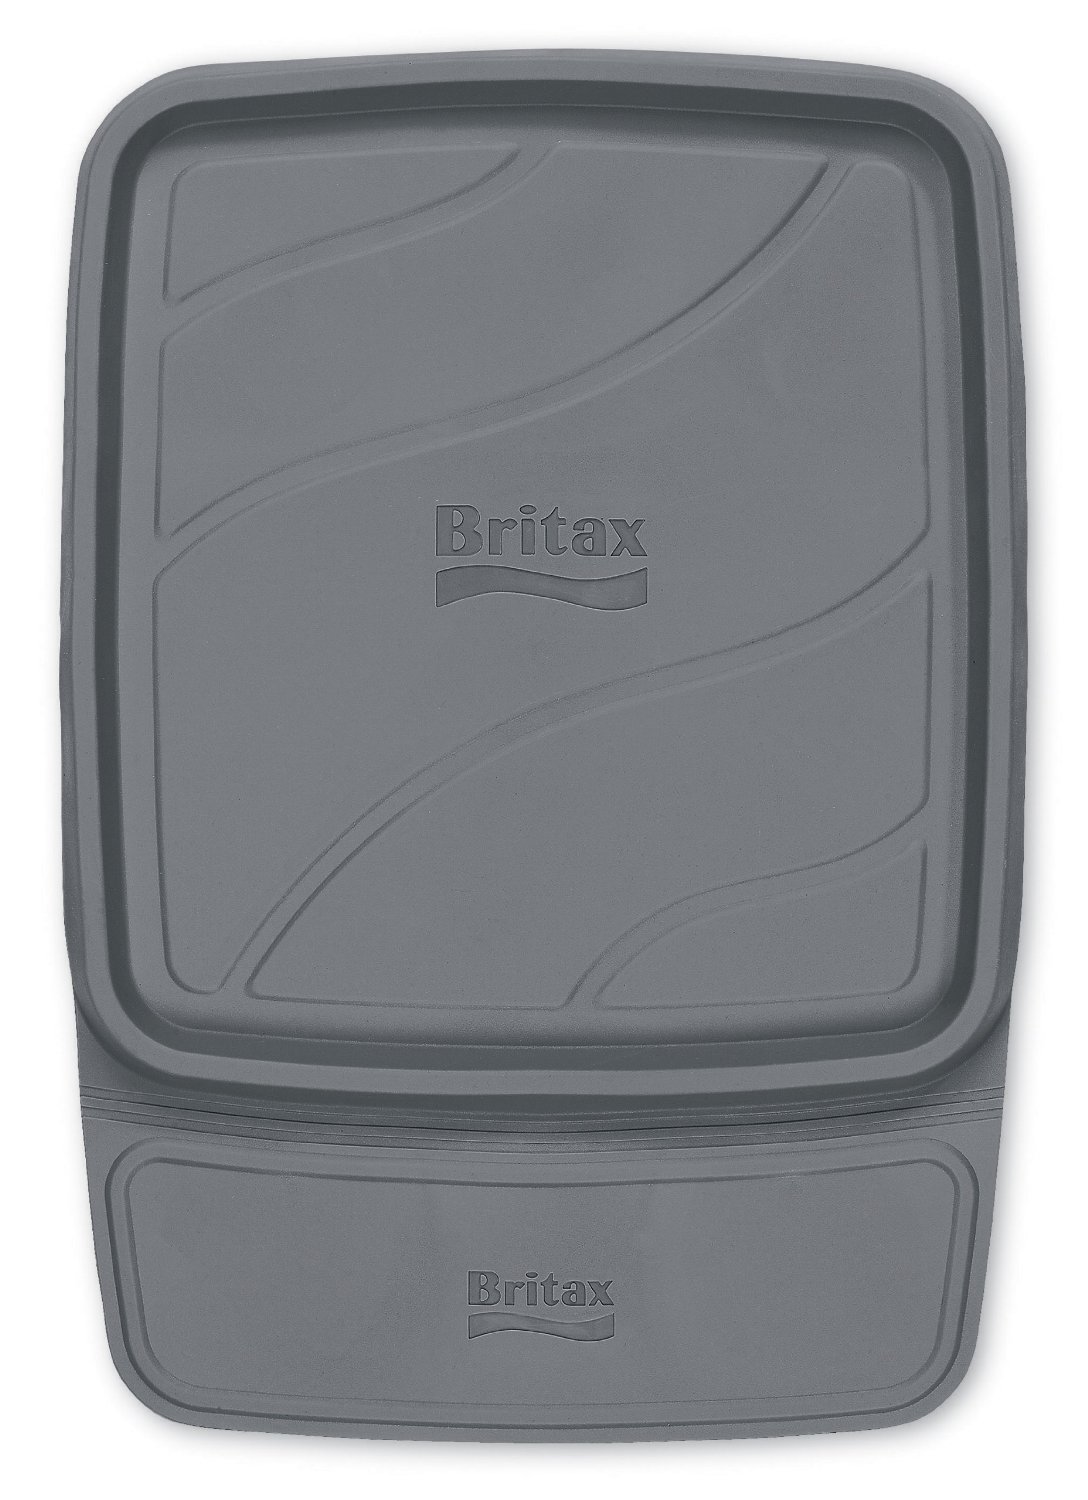
There are additional accessories available including a cupholder and a vehicle seat protector, which were manufactured and crash tested by Britax.
Advocate CT Specifications:
- Rear-facing 5-40 pounds, head 1 inch from top of fully extended headrest (which is very tall- one of the tallest rear facing seats on the market)
- Forward-facing 20-65 pounds, 49” or less, a least 1 year old (Britax recommends children rear face to the limits of the seat)
- Lower LATCH anchor limits: 30 pounds rear-facing, 35 pounds forward-facing
- 10! Year! Expiration!
- FAA approved for use on airplanes

Advocate CT Features:
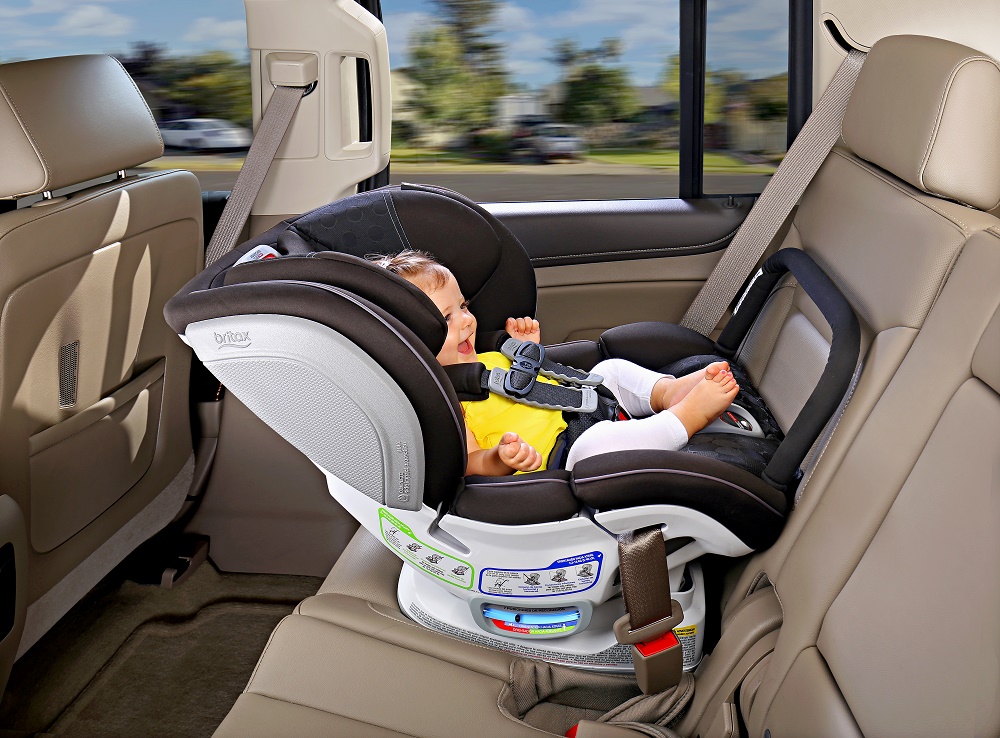
- ClickTight installation system- a built in lock off that installs the Advocate so easily you will think you’ve done something wrong, except it’s rock solidly installed and you have done everything right. It’s that amazing.
- 14-position headrest with no-rethread harness
- 2 crotch buckle positions with EZ-Buckle System, which keeps the crotch buckle out of the way during loading and unloading. Once you have this, you will wish every seat had it.
- Steel reinforced frame
- 3 layers of side impact protection:
1. energy absorbing shell
2. Foam lined headrest
3. External side impact cushions - Impact-absorbing base – contains cells that are designed to compress down during a crash and reduce forward head excursion for the child.
- Energy-absorbing Versa-Tether for forward facing
- 7 recline positions with easy to read angle indication bubble for rear facing angle. It has 2 zones- newborn and toddler to allow for more upright, but still safe, positioning for older rear facers. There’s no “too upright” when rear facing a toddler in this seat!

Measurements:
- Harness height range: 6.5” (with infant insert) to 18.5”
- Crotch strap positions: 5.25” and 7”
- Seat depth: 10.5”
- Internal height with headwings fully raised (to bottom of red harness adjuster): 27.5”
- Rear-facing seated height limit: 18.65”
- External width at widest point (side impact cushions): 20.5”
- Internal width of seat portion: 11.5”
- Internal width at shoulders: 16”
- Widest point of base: 14”
- Weight: 29.5 pounds (per my not always precise home scale)
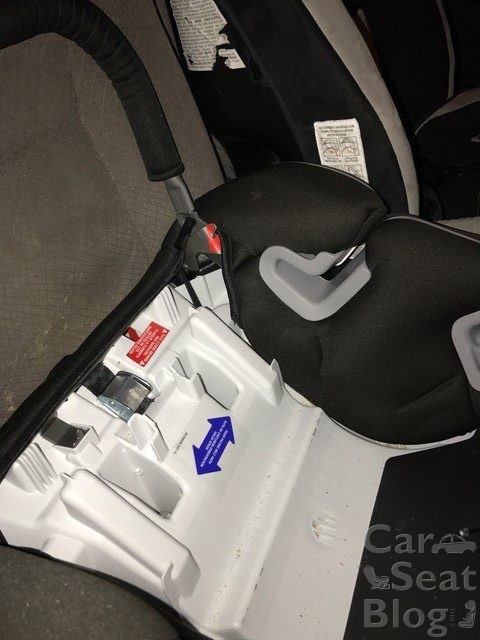
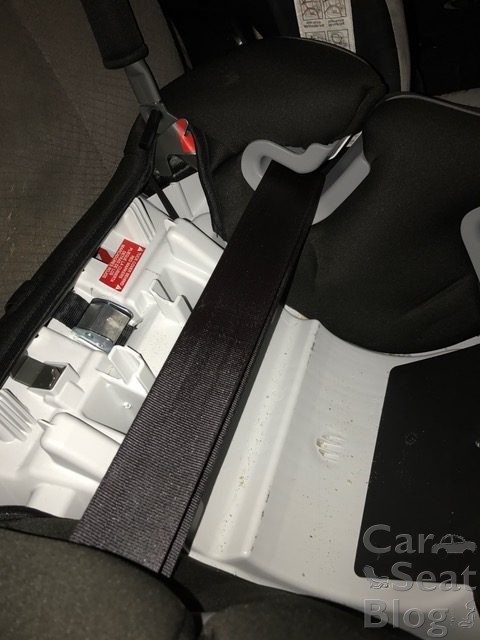
Attaching the ARB:
 The Anti-Rebound Bar is ONLY for rear facing, but the directions for opening the ClickTight panel for forward facing installation will be the same as below.
To attach the ARB, open the ClightTight panel by pressing the indentation on the circular ClickTight logo and then turning it like a key. The panel should pop right open. Once open, you’ll need to pull back the cover slightly to expose two small open areas near the foot area of the seat, which are marked with red. The ARB then just slides in place into those two slots. It does not click in or really secure itself until the ClickTight panel is closed, so don’t pull on it until you’ve installed the seat or it’s going to come flying out. Trust me, I did that, it was dramatic, hilarious, I almost took my own eye out and then I had to put it back in, which was thankfully easy. Here’s a quick video showing how to put the ARB into place.
Seatbelt Installation:
If you’re installing rear facing, the the panel should be open since you just installed the ARB. If you’re installing forward facing, follow the directions above to open the panel, and also unhook the Versa tether from the back of the seat because it will be next to impossible to get out once installed (don’t ask me how I know). Once the ClickTight panel is open, you will need to route BOTH the lap and the shoulder portions of the seatbelt through the proper belt path guide (which are labeled clearly for rear and forward facing), then pull out any excessive slack- but, and this is important- don’t spend a lot of energy pulling out all the slack, just remove any obviously large volumes of slack, then just shut the ClickTight door. Voila. Check the install by moving the seat side to side and front of back at the belt path and you’ll find that you easily get less than an inch of movement with almost zero effort. Make sure to connect the tether and remove any slack if installing forward facing.

If the panel does not close, you may have pulled the belt too taut and may need to give it a little more slack before you close the ClickTight compartment. Also, when installing rear facing, the seat almost always ends up more upright once installed than it looked when you were in the process of installing it. So if you’re planning to use this seat with a newborn, be sure and make the seat extra reclined prior to installation so it will be maximally reclined (to the newborn recline angle range) once that panel is shut.
LATCH Installation:
Truthfully, I don’t understand why anyone would want to use the lower anchors on this seat because the seatbelt installation is THAT easy, but in case you do, it’s also very easy. Remove the lower anchors from their compartment on the back of the seat. Open the ClickTight panel, route the lower anchors through the correct belt path, hook them onto the anchors, remove excess slack from the connector webbing, close the ClickTight panel and that should be it. Check for movement at the belt path, you need less than an inch side to side and front to back.
Tether:
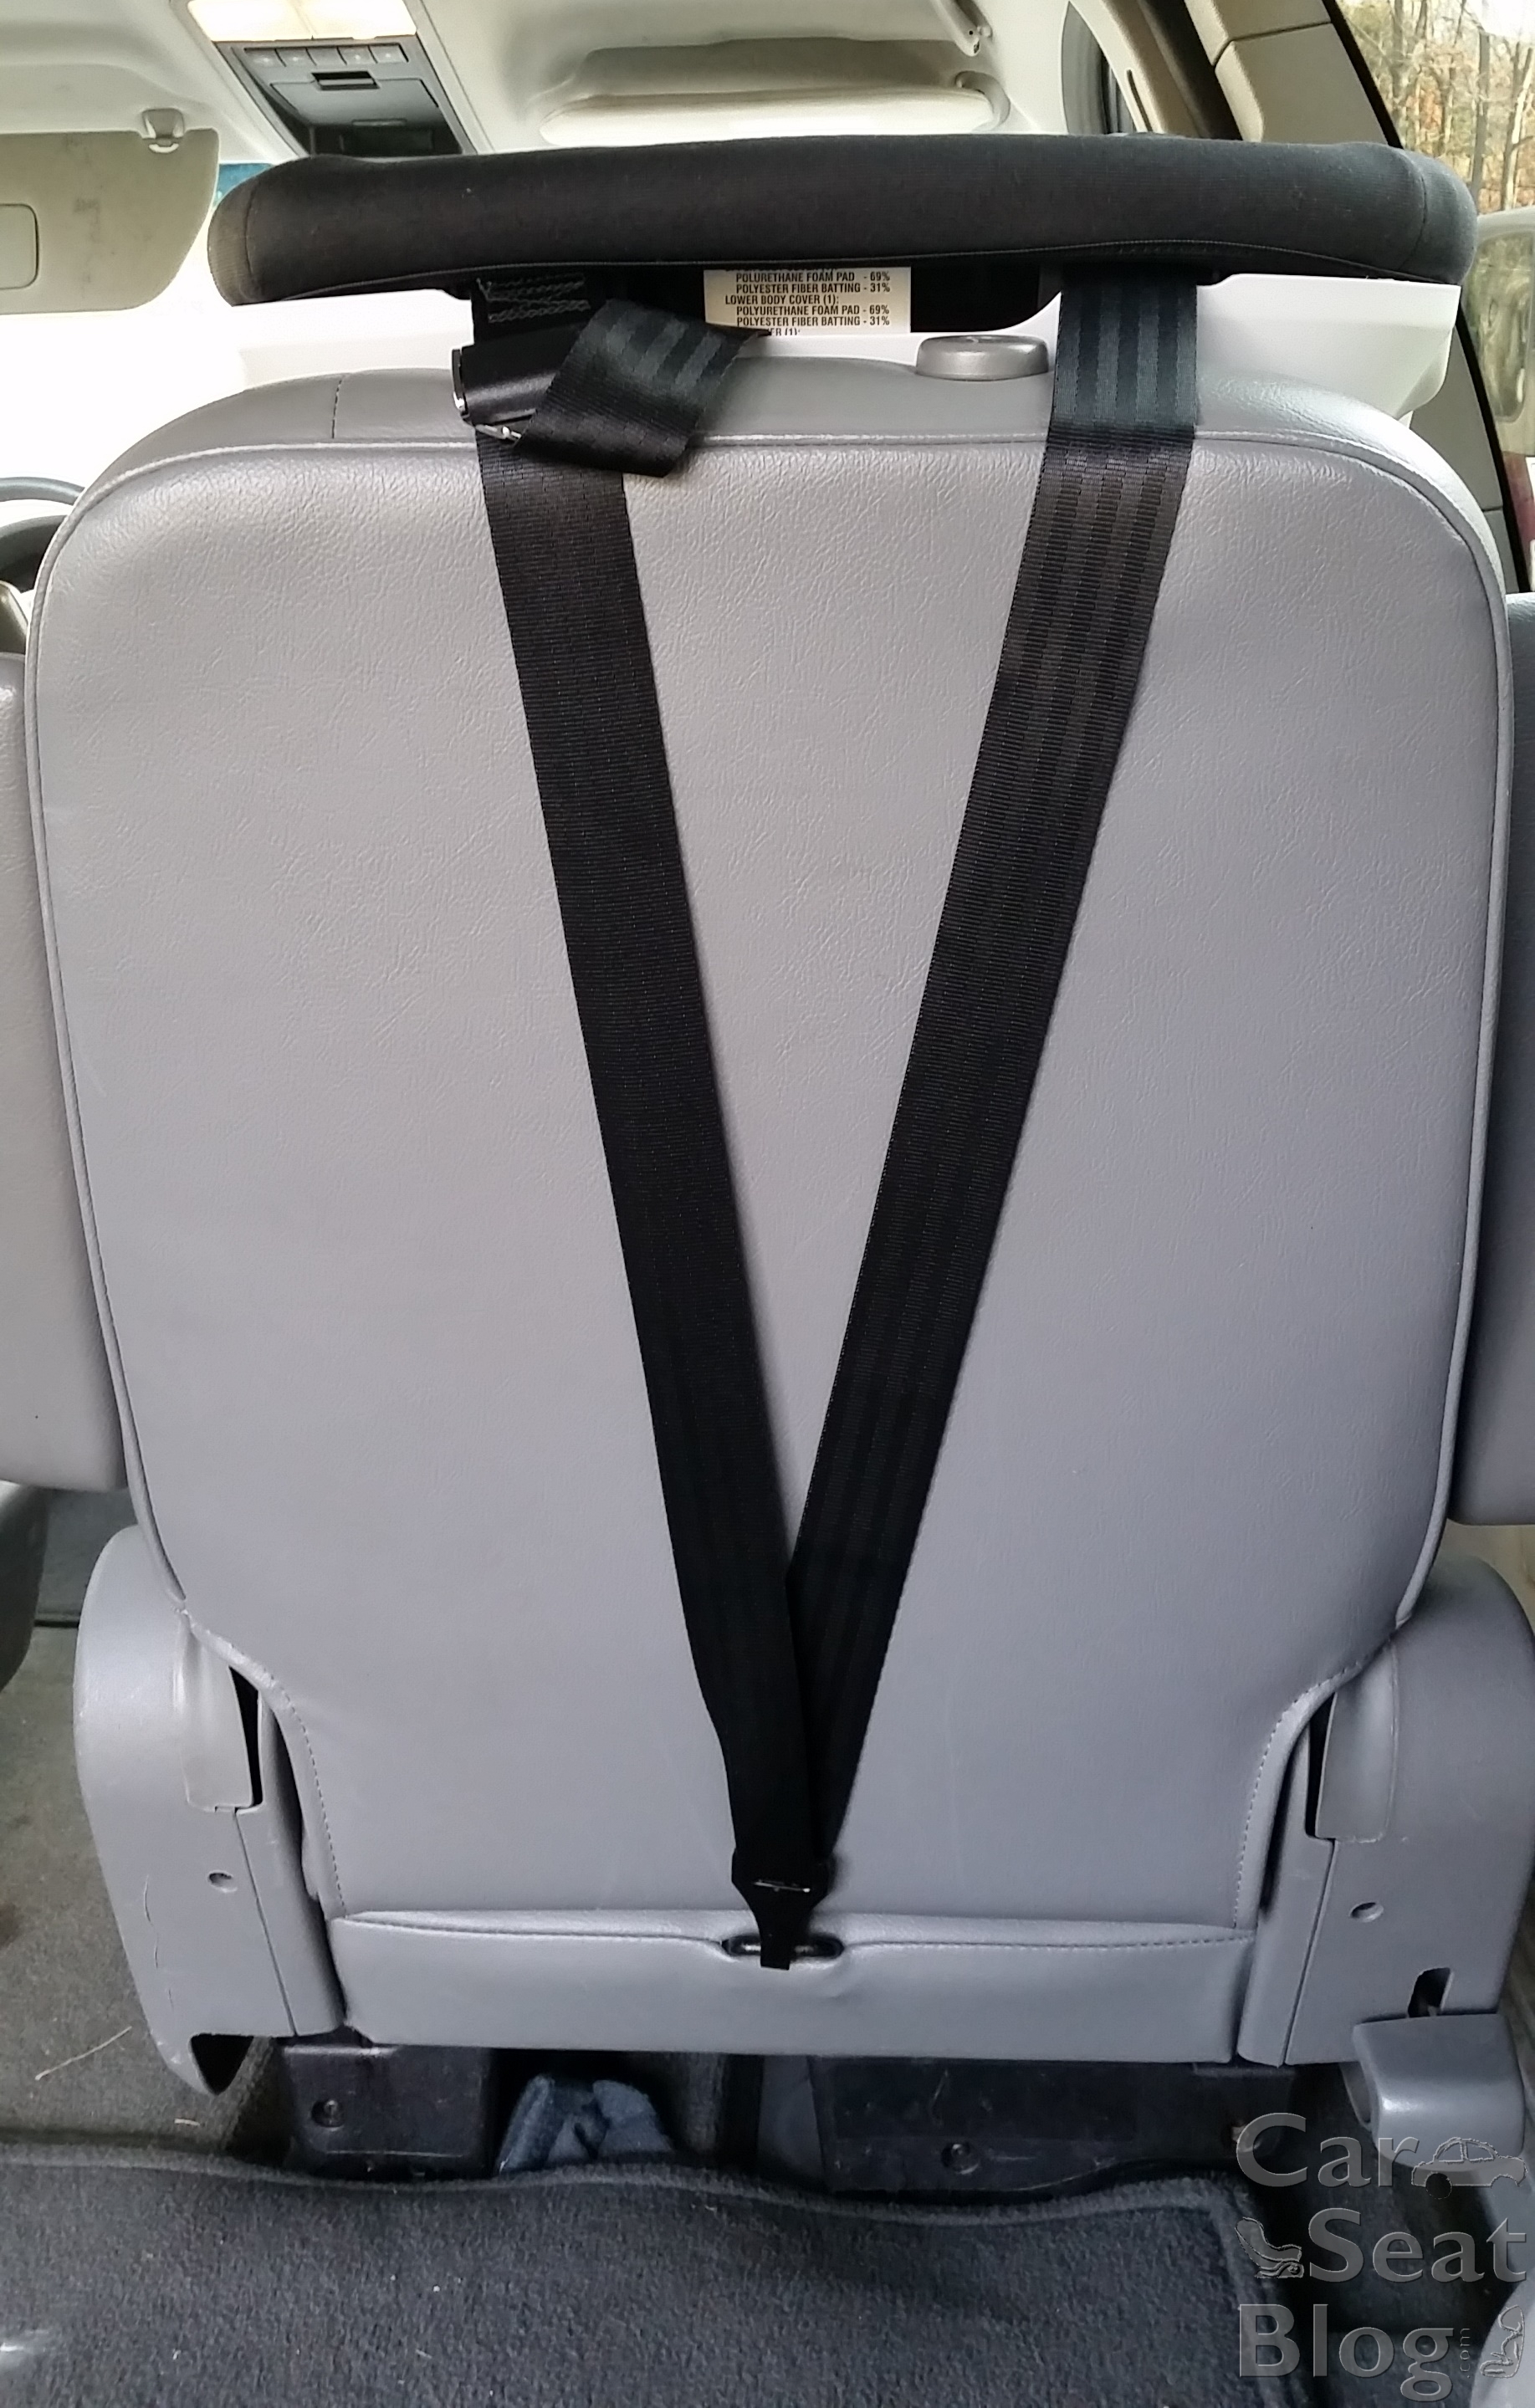 As mentioned earlier, make sure to attach the tether when using the seat forward-facing (and discontinue use of anti-rebound bar). The tether is stored in a compartment on the back of the seat, which is nearly impossible to access once the seat is installed forward facing. The tether should be used whether you install with the seat belt or lower anchors as it serves to dramatically reduce the forward head excursion of the child. Don’t skip this step, it is extremely important for safest operation of the seat!
Un-Installation:
This part is very important – you cannot open the ClickTight panel until the seatbelt/latch strap tension has been released. If you’re installing with the seatbelt, this is very easy- simply unbuckled the seatbelt, then open the CT panel. With the latch strap, it’s not quite so simple. The latch connectors are the old-style hooks (just another way Britax is screaming at you to use the seat belt!), so you can’t simply detach them like the seatbelt before opening the panel. Instead, you have to use the tension release button near one of the hooks to release the tension on the latch strap. This might take Hulk level strength/creativity, so this is just another reason the seatbelt installation is the way to go.
Other Installation Information:
If the headrest of the vehicle causes the Britax headrest to be displaced or prevents full extension of the headrest, Britax says that you should remove the vehicle headrest.
If the seat is too upright for a young infant, even on the maximal recline, you can use a pool noodle or rolled towel to achieve an appropriate newborn angle.
Here’s a comparison of the full recline verses the most upright position.


Fit To Child
My smallest model is a 1 month old baby boy named Clayton. He weighs 9 pounds and is 21.5 inches tall. I was worried when I went to snap this picture because I had left the infant insert at home by mistake, but this tiny guy fit beautifully without it. We actually had to bump him up to the second height setting on the harness because that’s how low the lowest setting is. If I had more time to play around with the fit for him, or if I was actually going to drive him anywhere, I would definitely have removed the huge rubber HUGS pads (and adjusted the crotch buckle cover down. Bad CPST.). It was tough to get a snug fit on a newborn with the rubber HUGS pads on, but the harness height was completely fine and I am very comfortable saying the Advocate CT would fit most average-sized newborns from birth with the infant insert.

My very petite 2 year old (32” and 23 pounds) is next, and as a middle-sized kid, it’s not surprising that he too had excellent fit in the seat. You’ll notice that he has a bit less leg room than maybe he would in some other seats.

The last rear-facing model is my average sized 4 year old (41”, 34 pounds). He is within the rear facing limits and had some room to grow within the harness. He definitely had less legroom in this seat as compared to how he fits in other convertible seats that he uses from time to time, so that’s a bit of a drawback.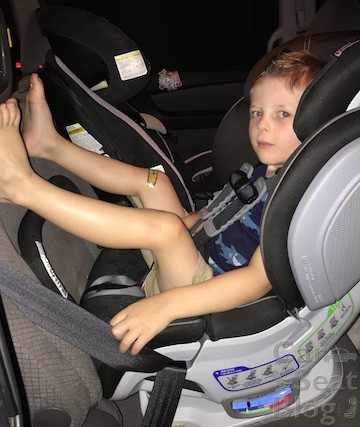
Forward-facing, the same 4 year old had good fit with two to three harness clicks left to grow. The crotch buckle has to be on the outer slot for forward facing and my son definitely would not have been comfortable without that adjustment.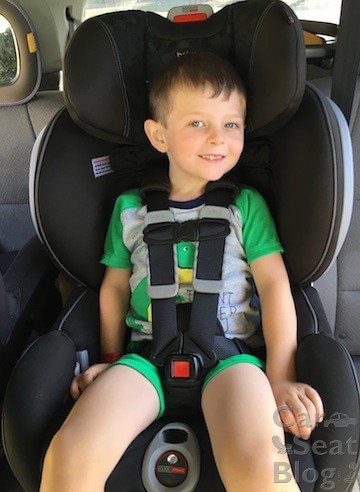
This is how the Advocate CT fits a much bigger child child. 7 years old, 50″ tall, 56 lbs., using the top harness height setting. She is technically over the 49″ stated height limit and she was a little cramped in there but her shoulders were still below the harness slots. This seat is outgrown by height once the child reaches 49″ tall or their shoulders are above the harness slots in the max height setting.

Update: Some caregivers have noted that earlier models had a short buckle strap; some children were bothered by this, some weren’t. If you open your ClickTight panel and see a metal plate at the buckle slot instead of the white plastic plate, your crotch strap is longer. This was a running structural design change Britax made in August 2017 and buckles are not interchangeable.


Ease of Use
- The installation is by far the biggest asset in this area. The recline mechanism adjusts without great effort, the ClickTight panel is very easy to use once you understand it.
- Tightening the harness can be challenging at first and if you are using the seat on a child over 24 months, you’ll need to lengthen the harness at the hip straps for extra room (video showing the lengthening process is here). Once the harness is lengthened, it should be easy to tighten.
- The Click & Safe snug harness indicator is intended to be an audible click to help parents be sure that the harness is snug enough. In my experience, it can be a bit misleading if you’re not careful to remove the slack from the hip area because it will click when it feels tension in the shoulders, but it may not account for trapped slack around the torso/hips.
Cover/Cleaning

Let me be upfront that I hate taking covers off of car seats and that I am generally terrible at it. There was nothing inherently difficult about taking the cover off the Advocate ClickTight with ARB or putting it back on, but it took me a solid 10 minutes for each. The cover is in 4 parts (5 if you count the buckle cover) and each part is a bit of a process. And if you don’t get it back in place *just so*, the ClickTight panel will not close, which is very frustrating after you’ve spent 10 minutes redressing a car seat. I would be unlikely to remove it without a significant vomit situation, but it’s far from impossible to do so.
The seat cover can be machine washed, but needs to be set out to dry. Harness is spot clean with water, do not saturate or submerge it.
Advocate ARB CT Advantages:
- The installation with the seatbelt could not possibly be easier. This would be an ideal seat if you knew you’d need to move your car seat around pretty frequently. It’s just nearly fool proof.
- The ClickTight compartment acts as is a lockoff also, so you don’t need to understand how your seatbelts lock and you don’t need to switch the retractor to locked mode if you do understand how to they lock.
- Very tall in both rear-facing and forward-facing mode
- 3 layers of side-impact protection for optimal protection
- 14-position no-rethread harness with easy adjustment
- 7-position recline with no limit on how upright the seat can be in rear facing mode for an older child
- EZ Buckle System keeps the crotch buckle out of the way for loading and unloading
- EPP foam, rip-stitch energy absorbing tether, HUGS pads and impact-absorbing technology in the base serve to absorb energy in a crash
- Removable harness strap covers and HUGS pads (may be removed in RF, unable to be removed when FF)
- Very compact when installed rear facing, even with the ARB installed
- 10 year lifespan before expiration
- Made in USA!
Disadvantages
(These are more like non-advantages, because none are truly that disadvantageous)
- Realtively heavy and bulky
- Rear-facing leg room for bigger kids isn’t great
- It’s wide because of the additional side-impact cushions. If it’s too wide for your situation, the Boulevard CT ARB offers essentially the same interior, but a narrower exterior
- Harness length needs to be manually adjusted at the hip straps (to make it longer) for kids over 2 years old
- Uninstalling the seat when installed with the hook-style lower LATCH anchors can be extremely challenging. Thankfully the seatbelt install is so easy there is no reason to ever install this seat using the lower LATCH anchors in your vehicle. Just remember to always use the top tether when you install the seat forward-facing.
Conclusion
The introduction of ClickTight technology a few years ago was revolutionary for car seats and it has greatly improved the ability of parents everywhere to do a proper seatbelt installation for their car seats without spending energy and time trying to get that last bit of slack out of the belt. With the addition of the anti-rebound bar (as Britax has phased out rear facing tethering) an already excellent seat is now even safer. The Advocate ClickTight with Anti-Rebound Bar offers outstanding ease of use from installation to every day useage, has ample safety features, especially side-impact protection, and offers some of the highest height limits of a convertible on the market today. You’d be hard pressed to find a seat with as many bells and whistles as the Advocate ClickTight with ARB. Once you go ClickTight, it’s hard to imagine going back and now with the added safety of the anti-rebound bar, that’s more true than ever.
For more information, check out the Britax Advocate ClickTight ARB page at: https://us.britax.com/advocate-clicktight-arb-convertible-car-seats/
Thank you to Britax for supplying the Advocate ClickTight ARB sample for this review. No other compensation was provided and the opinions and comments are entirely those of CarseatBlog.
Updated June 2019
CarseatBlog Experts Rating
Editors’ Pick Premium Category: Boulevard ClickTight
Also Recommended: Advocate ClickTight, Marathon ClickTight
We had this bar but just removed it as our children constantly were putting their feet underneath the bar since it doesn’t fit flush with the seat, and in an accident their feet would be crushed between the bar and the seat. I rang Britax NZ about this but they didn’t have any solution. This must happen with so many children who are tall enough to reach the ARB. I think it is a dangerous design in this particular respect.
Thank you for that feedback I just bought the Advocate without the rebound bar and was second-guessing it. I feel better.